

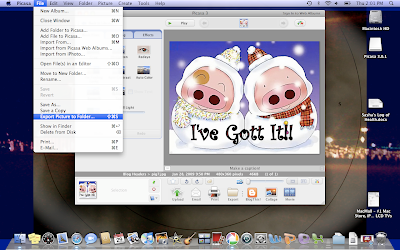
Once you have found a picture you like, save it and upload it to Picasa. If you have a Mac, I know it will upload your pictures automatically. After you've tweeked your picture to say what you want and look perfect, you need to export it to a file to change the size so it will fit in your header space on your blog. Here is a screen shot from my Mac. I believe on PC you could probably export it by going to "File" and looking for the same thing... Export Picture to Folder.
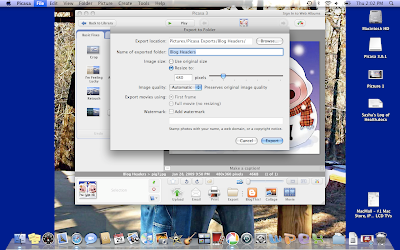
After that you should see a window pop up that will allow you to name the folder that you are exporting your picture to. You will also see where you are able to resize your picture. You will probably need to do this in order for your picture to fit in the header space on your blog. I resized mine to the second lowest tick mark. You might want to play with yours until you get it the way you want it. Here is the screen shot:
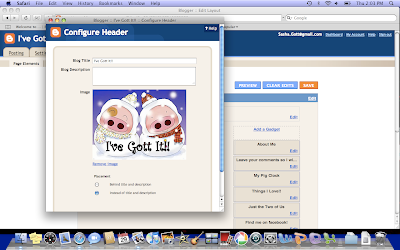
Finally go and put your new header on your blog. You will need to go into your layout and edit your header. Here is the last screen shot:
There ya go. I hope that helps anyone that would like to add a fun header!! If there are any directions that I missed please let me know. If you need any help, feel free to ask. Have fun and good luck!!


2 comments:
The header looks great! I love it! And these were great directions. :)
You can help me the next time you come over..how about that!!!!!!!!
Post a Comment